Pages

Wednesday 11 December 2013

Wrapping up 2014

Hi everyone,
How is your holiday planning going? Many presents being beautifully wrapped and placed under the tree? I know I have started although eagerly awaiting the arrival of majority of mine.

Literally wrapped up! Love the MWL gift wrap!
I wanted to let you all know some exciting things heading into 2014 but wanted to wrap up the year that has been 2013.

Firstly and most importantly I wanted to thank all my amazing customers for their support this past year.
This year has been hard for me for many reasons but mainly due to my health. It has really made all the difference having supportive and understanding customers and patient too. Being sick was out of my control but your support while I had my bowel removed and was recovering was something I will never forget. Those who sent messages and emails of support really helped on days that felt dark.
I also want to thank you for your patience while I have been sick with unexpected pancreatitis since September, which I am hopeful that it will be eliminated  for good after surgery in January.


If you tell a teenager you forbid them to see that boy they are hot for, they don't listen do they and by telling them you forbid something only makes them want it more?

Well that is what I did this year, except I am no longer a teen and already have the boy lol. I was told to take it easy to just relax, which my step mum actually commented this past week that it would be a miracle if I relaxed. I am someone who likes to stay busy and focused. I have a plan and I need to stick to it.

Well being told to relax and take it easy only made me more determined to work harder and to push boundaries I only ever imagined of accomplishing!

I am so proud of things that I have achieved this year both personally and in made with love.

Made With Love reached over 14,000 likers! I remember thinking I would never get passed 100! I appreciate every single one of your comments and likes on posts. Love having your support!

Snapshot of my website although it looks much more amazing in person check it out for yourself!
I finally got a website which is absoloutley amazing! A massive thank you to my incredible web designer Wendy who has been so supportive and always helping to update my website for me and is so efficient as well. If you want an amazing website that looks just as amazing on your phone or ipad oh and is affordable too, contact SiteFresh Web Design! They have a xmas special on at the moment too!
In the media page- well a snapshot of it!
This year also saw made with love in the media! For some of the media can be found on my website.

I was also asked to guest blog post for The Handmade Business Mentor and asked to be a regular craft/DIY contributor for Mouth of Mums.


August this year saw a special program released called 'Mums who LOVE Made With Love' which 24 mums were selected from applicants to be apart of a unique Made With Love experience where each mum would receive a full birthday stationary pack in exchange for a review. I have created so many different themes since August such as Minions and trains, Madhatter tea party, bubble party, playschool party, vintage carousels, Lego Ninjago, TMNT, and giggle and hoot inspired designs with some exciting themes coming up!

Some of my 2014 designs! Hundreds more created! No theme is too big or too small!
So far to date I have created a whopping 4000 handmade invitations! All made by me and made by hand!


I have started accepting orders for 2014 birthdays and already have bookings up until November- no that isn't a typo! With layby/payment arrangements available to make things more affordable and easier all that is required is a $20 deposit. To order or enquire you can do so via my website order form here.

I do offer loyalty rewards for all invitation orders such as:
* 10% off repeat invitation orders
* FREE gift with invitation orders either set of cupcake toppers or a deluxe handmade card
* FREE express post on orders over $100

Next year I am working on a monthly subscription where you will receive a DIY kit and tutorial to create a project. I am looking into sending out kits and tutorials each month.

I am also wanting to send out a monthly newsletter which will have info on the latest product/product of the month, a DIY project and also will have info on any competitions where you can win Made With Love that month. Will also include any special offers or be the first to see product releases.

I have about 5 orders to post out before Xmas and I am done for the year and will be taking a couple of weeks rested break as I have been working really hard to make sure all orders are out in time for Xmas! So if you have any questions you can always contact me through my website, email or facebook page and I will be available to answer any questions.


Thank you so much for all your Santa Key purchases and support! $1 from every Santa Key sale gets donated directly towards the Kmart wishing tree appeal helping less fortunate Australians enjoy some Xmas cheer. I will be heading out and purchasing $150 worth of gifts to be placed under the tree! Thank you!


If you are looking for some Xmas crafty fun I have created the 12 days of a DIY Xmas with some fun activities the kids will enjoy! You can find these here.

In February we will be turning 3! Have some great celebration ideas in play and hope that you will be as excited as I am!

Thank you so much again for all your support this past year and look forward to an even bigger and better 2014!

And thats a wrap!


Sunday 8 December 2013

On the Ninth Day of Xmas Made With Love showed to me...

... How to play a new game this Xmas Eve!

Santa can't deliver his present this year because his beard has fallen off and he needs your help in finding it for him!

How you can help is by playing 'pin the beard on Santa'! You can purchase the game for $2 from here!

I have created the perfect game for your children, and of course adults can play too!

Introducing pin the nose on Rudolph!

This massive A2 sized posted is printed in black and white which not only means that Rudolph needs to be coloured in (giving your children a task to complete) but when he is all coloured in and his nose cut out the game can start!

Simply put the poster up on your wall and with the same concept as 'pin the tail on the donkey' you need to pin the beard on Santa (using bluetack or sticky tape).

Have each child blindfolded and asked to spin around then place the beard where they think it should go.

The kids will have so much fun watching each other play and realising how close or how far away they were from the target!

The closest to where his beard should go wins the game!

I have created this to be printed off at your local officeworks for $1.49 (www.officeworks.com.au) and it is to be printed off as a black and white A2 plan. You can even upload to their website and have them delivered to you.

Once Xmas is over you can roll up the poster and put away for next xmas!

Guarantee to have a blast with this game!

You are purchasing two files one is the large A2 poster and the second is Santa's beard.

On the Eighth day of a DIY Xmas Made With Love showed to me...

.... How to pin the nose on Rudolph the red nose reindeer!

Something has happened and Rudolph has lost his nose! He needs your help so that he can help guide Santa's sleigh!


How you can help is by playing 'pin the nose on Rudolph'! You can purchase the game for $2 from here!

I have created the perfect game for your children, and of course adults can play too!

Introducing pin the nose on Rudolph!

This massive A2 sized posted is printed in black and white which not only means that Rudolph needs to be coloured in (giving your children a task to complete) but when he is all coloured in and his nose cut out the game can start!

Simply put the poster up on your wall and with the same concept as 'pin the tail on the donkey' you need to pin the nose on Rudolph (using bluetack or sticky tape).

Have each child blindfolded and asked to spin around then place the nose where they think it should go.

The kids will have so much fun watching each other play and realising how close or how far away they were from the target!

The closest to where his nose should go wins the game!

I have created this to be printed off at your local officeworks for $1.49 (www.officeworks.com.au) and it is to be printed off as a black and white A2 plan. You can even upload to their website and have them delivered to you.

Once Xmas is over you can roll up the poster and put away for next xmas!

Guarantee to have a blast with this game!

You are purchasing two files one is the large A2 poster and the second is Rudolphs's nose.

On the Seventh day of a DIY Xmas Made With Love showed to me...

... How to make a keepsake from the holidays!

If you love cherishing memories and if you love doing craft then I have the perfect project for you where you can create a holiday keepsake this year.

Using a verse that I have created each page to be decorated will have something to do with xmas.
This is an image of the verse I created for a print which I will be printing off to display as part of my home decor. I can print this off as an A2 sized posted at officeworks for $10!

I have had this project in mind for a while and wanted to create something that you can turn into a holiday keepsake by collaging images from magazines, from drawing your own images, from adding in photographs and the possibilities of what you can use this for are endless.

Perfect to put away in their keepsake boxes to pull out at their 21st birthday.

This project is perfect for letting your imagination roam freely as each page is up to your interpretation. I have also included a few pages I created to give you an idea.

Each page is 14.8cm x 10.5cm in size so plenty of space to go crazy with your scissors and glue (within reason of course).

So are you ready to have fun?

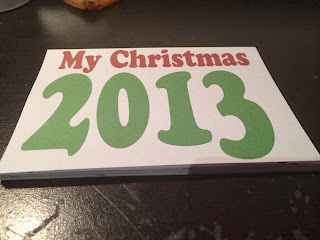
These are images of the PDF printable each page (which will be not be watermarked when downloaded):


Now lets make this DIY keepsake book!
To make this holiday keepsake book you will need:
*The PDF printable which can be purchased from here for $1
*Scissors
*glue
*Key ring (jump ring)
*hole punch
*You will also need other materials depending on how you decide to do each page such as cardstock, paper, photos, magazines, embellishments and more!

Step 1:
You will need to purchase this project from my etsy store for $1 to create this project. This can be purchased from here. You will not receive a watermarked version, this image above is for example purposes only. It is an instant downloadable file once purchased you can download and print the file.

Step 2:
You will need to cut each page into 4 rectangles that are 14.8 cm wide (half an A4 width) and 10.5cm high (half an A4 in height).

Step 3:
You will need to hole punch each page. Depending on your type of punch you could be able to hole punch more then one page at a time. I have hole punched the top left corner. You could also punch the sides to make it into a binder book as well.

Step 4:
Thread the pages through the key ring (jump ring) making sure that the pages are in chronological order. I have used a jump ring with a hook so that it can hang and be displayed in my home. I have no idea what or where I got it from just happened to find it sitting on the bench- score! Love when you can find purposes for things otherwise deemed useless!

Step 5:
Start decorating each page with however your imagination sees fit! The possibilities are endless! I created an angel for the A page.

Other pages I created for examples are below:


I hope you enjoy creating this fun and imaginative keepsake and please feel free to share your creations!


Saturday 7 December 2013

On the sixth day of a DIY Xmas Made With Love showed to me...

... How to make a round scalloped decoration for my tree!

If you LOVED the tutorial I introduced to you on day 2 of a DIY Xmas where I showed you how to make a pretty and easy round bauble decoration for your tree, then you are going to love this one just as much!

Basically following the same steps as the round bauble but instead this is a round scalloped bauble,

Want to make this? Then follow the tutorial!

You will need:
*Paper can use any pretty paper, doesn't have to be double sided. For this tutorial I used Kaisercraft xmas paper.
*Circle scalloped Paper Punch- For this tutorial I used 2 3/8" punch from Stampin Up! You can use any circle punch to create this tutorial yourself. (This punch I used can be ordered from Made With Love).
*Scissors (to cut the twine)
*Twine- I absoloutley LOVE Whimsy Farm Twine which I have used in both this tutorial and the first picture. You can purchase 100m for $5 (plus postage)! The quality is really amazing!
*Glue- I used glue tape for this tutorial but you can use any glue you like.
*Bone folder- These are used to create finer creases

Step 1: 
Select which paper you want to use and begin punching out your 9 circles. I find it best to hold the punch upside down so you can see your placement of paper and how it would look when its punched. I also try and punch as close to the edge as possible that way I can re use the scraps in the centre (I have boxes and boxes of scraps I WILL use one day). 


Step 2:
Begin folding your circles in half. Which ever pattern you want to see on your decoration you fold so this is on the inside of the circle. If you only have one sided decorative paper, you would have the pattern on the inside with the white on the outside. You wont see the outside colour or pattern as it will be covered. With your bone folder run this along the folded crease until your crease is defined and your folded circle should be completely flat.

Step 3:
Grabbing one of the circles now folded and properly creased apply the glue to one side only, usually the top of the folded circle, as shown in the picture above.
Step 4:
 Now get two folded circles and join the surfaces that have been covered in glue together. To best line them up place on your workspace like I have in the picture and once they are aligned press both folded circles together.
Repeat this step and process until all the folded circles are paired. You will have one set of 3 and 3 sets of 2 folded circles together.

Step 5: 
Start to glue two sets together like shown. Repeat until all sets of folded circles are now joined as one (see picture below).

Step 6:
Turn over the group of circles so far and apply glue to both sides of the folded circle as shown above.

Step 7: 

 Cut a piece of twine. This will be used to hang your decoration. I recommend cutting a piece no longer then 15cms.
Fold your piece of twine in half and then tie a knot on the ends like shown in the picture below..

Step 8:
Finding the centre of the group of joined circles fold this so that the centre spine is revealed like in the picture above.
Then place the knotted twine in the centre of the spine fold and begin to unfold the sides so that the two pieces with the glue on them can be joined. Like in this picture below.

Step 9:
Making sure that the two glued sides line up press firmly together. 

And Voolah! You have created your own round scalloped xmas bauble!


I hope that you enjoy this day 6 tutorial! Be sure to come back tomorrow for day 7!


Design by Small Bird Studios | All Rights Reserved